Did You Know? Custom Boards
Dear Urban Turtle lovers, or users, or both, or just turtle curious;
We are receiving a lot of questions on how to use Urban Turtle. That’s why we decided to start a new series of blog posts that will show you how to maximise your experience with the turtle’s features.
So, here is the first “Did you know” post! Today, we will show you how to customize your workflow through the “Custom Boards” tab without having to manually modify XML files on your TFS server.
Create a board that fills your needs
The baseline workflow that is proposed in our Sprint Backlog is not meeting your needs? There's an easy way to extend this workflow using custom boards.
With a custom board, you will be able to:
- add new steps to your workflow
- assign tasks to users
- manage your work in progress
- map your different statuses to your workflow
- map your different work item types to the board.
To do so, go to the "Configuration" tab in your Urban Turtle environment. Then, click on the "custom boards" tab. You are now entering the fantastic world of customization!
Create a new board and give it a relevant name like "Kanban", "Scrum 2.0", or "My Amazing Board That Fills My Specific Needs". Once the board is created, you can add the number of columns you need. This will help you manage your work the way you want.
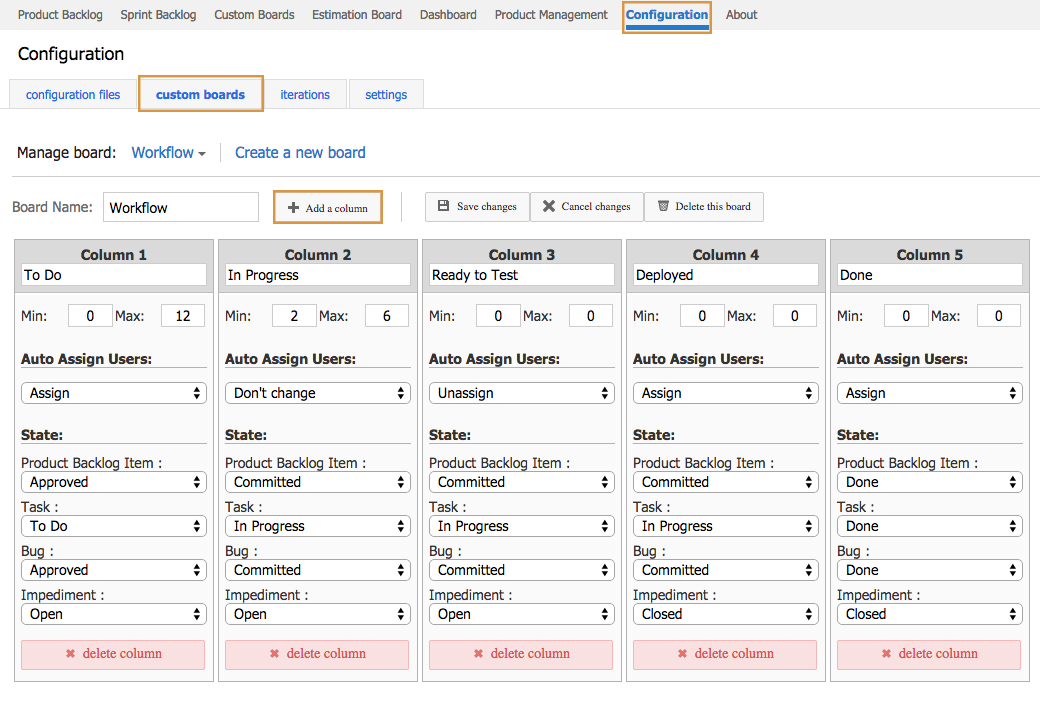
Customize your columns
Work in progress
After creating the number of columns you need, you can configure some specifications related to your reality. The first elements that you can set up are limits for the work in progress (WIP). In fact, you get a visual signal when the total of work items exceeds these limits. Note that WIP limits are disabled when both the minimum and maximum fields are set to 0.
Auto-assign users
The other interesting customization that you can manage is the "Auto Assign Users". Here are the 3 different options:
- Assign: The user dragging a card into that column will automatically have this card assigned to him.
- Unassign: When the card is dragged into a column with that specification on, any assignee will be removed from the task.
- Don't change: Well, you know what it means!

Map your status
It is with this function that you indicate to Urban Turtle what to display and where to display it. For each work item type that you have, you will need to select the status that will be set or used for each step of your work flow.
Hint: The same status can be used on multiple columns. This means that you can configure your “Task” to be “In progress” for columns 2, 3, and 4.
Hint: Let’s says that, for some reason, you don’t want to see “Bugs” in your board. You can do this by not mapping any status for that specific type of work item.
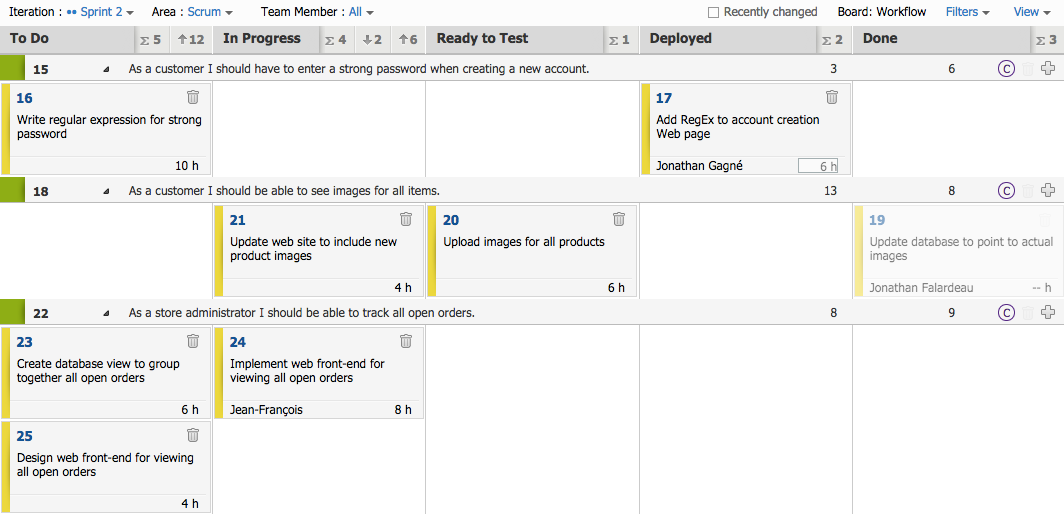
The final result!
Now that your custom board is set, you just have to go to the "Custom Board" tab and assign your board to the appropriate iterations. You are ready to use it.
Don't hesitate to submit a topic for another "Did you know" post via the comment box!